Raspberry Pi Vibration Sensor Easy to Trigger
A vibration sensor, also known as a piezoelectric sensor, has many types that are used to measure the acceleration, pressure, vibrational changes of a device or system.
It can be used alongside an Arduino or Raspberry Pi through the miniaturized or MEMS vibration sensor modules that are common nowadays. This allows for vibration sensor applications to be easily fulfilled in a smaller and accessible form factor.
In today's vibration sensor guide, I'll be covering the following:
- What are the types of vibration sensor
- Why are vibration sensors used
- Vibration sensor applications
- How to choose a vibration sensor
- Vibration sensor Arduino Guide
- Vibration sensor Raspberry Pi Guide
- Vibration sensor Projects to try
If you're looking for a particular section, Simply search for it by pressing CTRL+F on your keyboard !
What are the types of Vibration Sensor
1. Eddy Current
Eddy current or capacitive displacement sensor is a non-contact vibration sensor type that generates magnetic fields to measure the change of position in a conductive component.
Such vibration sensor requires the sensing object to be large enough then the sensor diameter for general sensing to take place.
2. Velocity Sensor
The velocity sensor is a vibration sensor type made for high-temperature measurements through the usage of a current generated from a magnet traveling within a coil.
Popular due to its less susceptibility to amplifier overloads as compared to accelerometer and gyroscope sensors, velocity sensors are not to mess with!
3. Strain Guage Sensor
A strain gauge sensor is a vibration sensor type that measures the strain on machinery through converting force, pressure, tension or weight into a change of electrical resistance.
It's used mainly for machinery applications and objects that have curved surfaces.
How a strain gauge sensor works:
- External forces are applied to the machinery, resulting in the presence of stress and strain
- The strain gauge sensor picks up the strain present, converting it into a change in electrical resistance
- The change in electrical resistance can be then measured to give us the amount of strain on the machinery
4. Piezoelectric Accelerometer Sensor
Perhaps the most preferred vibration sensor type is piezoelectric accelerometer sensors. Versatile, wide dynamic range, with support for many potential applications such as vibration sensor alarm, security systems, industrial usages, etc.
Why are vibration sensors used?
You may be wondering why are vibration sensors used? Well, if you think about how the seriousness of a little vibrational movement may cause, it answers part of your question.
- Vibration sensors help to detect these vibrational movements, that may cause earthquakes or more commonly mechanical failures in machinery
- Its ability to measure, monitor, and analyze such help detect potential issues such that early preventive measures can be taken!
What are vibration sensors used for? Key Applications
Vibration sensors can be used in a wide array of applications, though it solely depends on the type of vibration sensor you're using. The characteristics of each will decide which suitable applications can be used.
- Vibration sensor alarm
- Generating a loud beep when someone tries to break-in, with the alarm stopping automatically after a few minutes
- Industrial health monitoring
- Vibration can be used to monitor machinery health, similarly to what was talked about in the earlier section
- Low power wake-up vibration sensor switch
- Other security systems such as car alarms
How to buy a vibration sensor?
Since there are many types of vibration sensors, selecting one that's best for your intended application may be a tough challenge. Hence, I've provided a table summarising the features you should consider when selecting a vibration sensor!
| What you should consider when selecting a vibration sensor | Explanation/Rationale |
|---|---|
| Measuring and dynamic range | Wider measuring and dynamic range allow for a bigger field of sensing scope/capabilities |
| Environment conditions of usage | Environment conditions of usage affect a vibration sensor durability Consider the following: If all of the above components are rated "High", industrial grade vibration sensors are more suitable |
| Frequency | Frequency is measured in HZ and it affects the accuracy of vibration sensors as it's typically represented as a % of allowable error over the full measurement range of the device |
| Sensitivity | Higher amplitude vibrations favour a lower sensitivity sensor, vice versa However, the peak g level shouldn't exceed the acceleration range of a vibration sensor as it'll result in amplifier overload and signal distortion |
Which Vibration sensor module to buy? Recommended list at Seeed
Now that we've understood the factors you should consider when buying a vibration sensor, here are two of our recommendations from Seeed!
1. Grove – Vibration Sensor (SW-420)

Need a low-cost vibration sensor that not only fulfills your vibration sensing needs but offers high sensitivity at low frequencies? The Grove – Vibration sensor is the perfect option for you!
With the thought of users in mind, this vibration sensor is designed with adjustable sensitivity option as well, allowing you to tailor the sensor according to your own needs
Its features include:
- Non-directional
- High sensitivity (adjustable)
- Respond to vibration, tilt
- When movement or vibration occurs, the circuit will be briefly disconnected and output low
- Waterproof
- Compression resistance
All in all, this vibration sensor module is perfect in helping you get started with vibration or tilt sensing.
- For more information on a vibration sensor circuit diagram, we've provided one that explains the working principle of this module here!
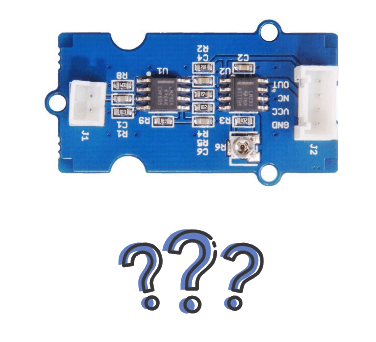
2. Grove – Piezo Vibration Sensor

Need an upgrade from the earlier vibration sensor module? The Grove – Piezo vibration sensor offers just that, with better performance and versatility!
Based on the PZT film sensor LDT0-028, this vibration sensor has a wide dynamic range of 0.001Hz to 1000MHz, providing an excellent measurement performance for all your sensing needs!
Not only that, it remains a high receptivity for strong impacts and has an adjustable sensitivity function as well!
Its features summarised:
- Standard grove socket
- Wide dynamic range: 0.001Hz~1000MHz
- Adjustable sensitivity
- High receptivity for strong impacts
All in all, the Grove – Piezo Vibration Sensor is for you if your project has a higher performance requirement and requires a more versatile option!
How to use a vibration sensor with Arduino and Raspberry Pi?
As we provide both vibration sensor Arduino code alongside a Raspberry Pi demo code for the Grove – Piezo Vibration Sensor, we'll be using this module for today's tutorial.
- If you require the Arduino code for our Grove – Vibration Sensor (SW-420), you can head to our wiki page!
Vibration sensor Arduino Tutorial
For this vibration sensor Arduino tutorial, we'll be showing you an example of how the Piezo vibration sensor control an LED through detecting vibration.
What do you need?
- Seeeduino is Seeed's very own Arduino board, made with relative benefits over the original
- You can still use your Arduino boards for this tutorial as it's compatible with the base shield
Hardware configurations:
- Step 1: Connect the Grove – Piezo vibration sensor to the D2 port of the base shield using the grove cable, we use digital pin13 onboard LED as output
- Step 2: Plug the Base Shield into Seeeduino
- Step 3: Connect Seeeduino to PC using a USB cable
It should look something like this after the above steps:

Software configurations:
- Step 1: Copy and paste the code below to a new Arduino sketch
const int ledPin=13; void setup() { Serial.begin(9600); pinMode(ledPin,OUTPUT); } void loop() { int sensorState = digitalRead(2); Serial.println(sensorState); delay(100); if(sensorState == HIGH) { digitalWrite(ledPin,HIGH); } else { digitalWrite(ledPin,LOW); } } - Step 2: The LED will then be on when vibration is detected
Vibration Sensor Raspberry Pi Tutorial
For pairing the Piezo vibration sensor with Raspberry Pi, you'll need the following hardware components:
- This tutorial uses a Raspberry Pi 3 Model B, but it supports Raspberry Pi 2/3B+/4/Zero as well
Hardware configurations:
- Step 1: Plug the Grove Base Hat into Raspberry Pi
- Step 2: Connect the Grove – Piezo Vibration Sensor to port 12 of the Base Hat
- You can connect the piezo vibration sensor to any GPIO port as well but ensure you change the command with the corresponding port number
- Step 3: Connect the Raspberry Pi to PC through a USB cable
It should look something like this after the above steps:

Software configurations:
- Step 1: Follow Setting Software to configure the development environment
- Step 2: Download the source file by cloning the grove.py library
cd ~ git clone https://github.com/Seeed-Studio/grove.py - Step 3: Execute the commands below to run the code
cd grove.py/grove python grove_piezo_vibration_sensor.py 12 Following is the grove_piezo_vibration_sensor.py code
import time from grove.gpio import GPIO class GrovePiezoVibrationSensor(GPIO): def __init__(self, pin): super(GrovePiezoVibrationSensor, self).__init__(pin, GPIO.IN) self._on_detect = None @property def on_detect(self): return self._on_detect @on_detect.setter def on_detect(self, callback): if not callable(callback): return if self.on_event is None: self.on_event = self._handle_event self._on_detect = callback def _handle_event(self, pin, value): if value: if callable(self._on_detect): self._on_detect() Grove = GrovePiezoVibrationSensor def main(): import sys if len(sys.argv) < 2: print('Usage: {} pin'.format(sys.argv[0])) sys.exit(1) pir = GrovePiezoVibrationSensor(int(sys.argv[1])) def callback(): print('Detected.') pir.on_detect = callback while True: time.sleep(1) if __name__ == '__main__': main() Afterward, you should be able to see the following result; indicating that everything has gone smoothly
[email protected]:~/grove.py/grove $ python grove_piezo_vibration_sensor.py 12 Detected. Detected. Detected. Detected. Detected. Detected. Detected. Detected. ^CTraceback (most recent call last): File "grove_piezo_vibration_sensor.py", line 84, in <module> main() File "grove_piezo_vibration_sensor.py", line 80, in main time.sleep(1) KeyboardInterrupt Vibration Sensor Projects to try
Now that we've understood how to pair Arduino and Raspberry Pi with a vibration sensor, here are some projects you can get started with!
1. Smart Basketball Scoreboard

Are you a frequent basketball player or tend to mix your workout in with basketball training? If so, this project is for you!
Combining a vibration sensor with Arduino alongside other components, you can easily turn your basketball hoop into a smart one that allows you to track your shots!
What do you need?
Hardware components:
- Arduino Mega 2560 & Genuino Mega 2560
- Bluetooth Shield
- E18-D80NK Infrared Proximity Sensor
- Seeed Grove – Vibration Sensor (SW-420)
- 8MM RGB LED
- Resistors
- 1 Resistor 10k ohm
- 3 Resistor 100 ohm
- 1 Through-Hole Resistor 47 ohm
- Rechargeable 15,000mAh Li-ion Power Battery
Software components:
- Arduino IDE
- MIT App Inventor Andriod IDE
Interested to find out more? Check out the full tutorial by Marcelo Avila de Oliveria on Hackster.io!
2. Never Ride Alone

Are you a cyclist and fear that one day if you encounter an accident that no one could find you up the hills? If so, this project is for you!
This project helps to locate bikers that are injured through the Sigfox network, and improves visibility on the road as well!
What do you need?
Hardware components:
- 5mm red LED
- Seeed Grove – Vibration Sensor (SW-420)
- u-blox Ublox neo 6m GPS
- Arduino MKR Fox 1200
- Battery, 3.7V
- Buzzer
- Pushbutton switch 12mm
- Slide Switch
- Resistor 1k ohm
Hand tools and fabrication machines:
- 3D Printer (generic)
Interested to find out more? You can check out the full tutorial by Jesus Soriano on Hackster.io!
3. Smart Doorbell with Alexa and Raspberry Pi
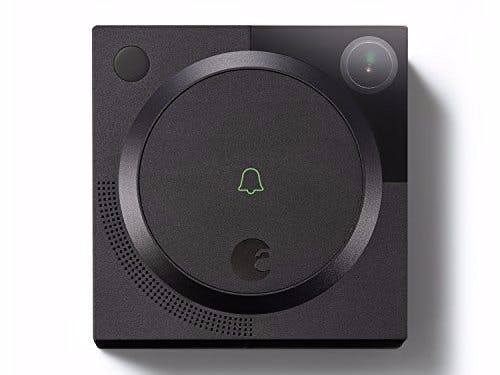
Want a smart doorbell that not only asks the person who knocks on your door who he/she is, but takes a picture and checks it against the database to find a possible match? This project is for you!
What do you need?
Hardware components:
- Raspberry Pi 3 Model B
- Raspberry Pi Camera Module
- Seeed Grove – Piezo Vibration Sensor
- Microphone Amplifier Breakout
- Speaker: 3W, 4 ohms
Software apps and online services:
- Amazon Alexa Voice Service
- Clarifai
Interested to find out more? You can check out the full tutorial by Parth Singh on Hackster.io!
Summary
That's all for today on vibration sensors. I hope with today's blog, you get a deeper understanding of what it is, how it works, how to buy one and pairing it with an Arduino, Raspberry Pi!
To help you easily get started, do consider the list of vibration sensor I've recommended:
- Grove – Vibration Sensor (SW-420)
- Grove – Piezo Vibration Sensor
For more on motion sensing, you can check out these posts:
- Accelerometer and Gyroscope
- LSM303 Accelerometer
Source: https://www.seeedstudio.com/blog/2020/01/07/vibration-sensors-types-how-to-use-with-arduino-and-raspberry-pi/